Thursday, 12 November 2015

Dabbling in color

So. Since I quit one of my jobs (the one where I left the house for 40+ hours a week, I'm still a mom, wife, etc) in the spring I've been wanting to do something with the crafts I know to bring in some money so that I didn't have to find another lab job. At least not right away.

I'm really enjoying being at home. My older daughter is in school and my younger in preschool so I have the house to myself. I've been trying to finish some things around the house that needed doing and I started making things.

I knew that people wouldn't pay me any reasonable wage to knit. I thought that perhaps I could do some needlefelting, but I just don't enjoy it to the degree that I would need to make enough to sell. Again, people were probably unlikely to pay me a reasonable wage for the fancier items because they take a while to make. I tried making smaller items, but couldn't really get behind it.

I started talking with a couple friend about dyeing yarn to sell. This was an idea I could get behind. I'm interested in gradient/ombre yarns and yarns with a longer color repeat. They have grand plans that sound great, but for now, I just want to start dyeing and selling and see how it goes without making it complex. It will hopefully get us some money to sink into bigger plans and give us some experience so the transition into those plans may go more easily.

My husband has been encouraging me to get dyeing and start by selling at a local meeting. I'm looking into the technicalities of selling at the meeting.

I've started dyeing up some yarn and have already learned lots.

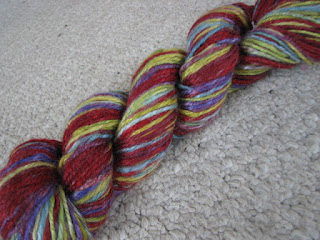
I was able to make a rainbow and black skein for rainbow stripy socks...that are missing purple. This is my test to see how it would look knit up and figure out gauge. I plan to knit these into socks to use as an example. They are dyed to make matching, sport weight socks.


This is one of my favorites, but it doesn't look quite like it does in the picture. It is actually a light turquoise to a darker turquoise to a dusky blue to black. I'm thrilled with how it turned out!


Here is another gradient I did. The photo is more faithful to the colors. It is light pink to dark pink to a purplish color then dark to light gray.


Here's the trio of the latest batch. Rather than gradients, these have long color repeats. The purple and chartreuse has roughly 10 yard repeats as does the black and yellow. The third ball has 10 yards of gray and 5 yards each of purple and fuchsia. 


I think it looks very striking. My husband recommended these colors based on the colors I had chosen for a cowl I knit last spring.

These are the start of what I hope will become a successful yarn dyeing business with friends. Most of the above will be offered for sale.

Monday, 2 November 2015

Necessity is the mother...

A week or so ago, a friend posted a link to this gorgeous shawl:


Yes, that's a knit Maple leaf to use as a shawl.  The pattern is on Ravelry: http://www.ravelry.com/patterns/library/maple-leaf-knit-shawl

Most of you reading may think that this post will be about how I knit this gorgeous shawl and want to show it off, but not yet. I decided that I must knit this shawl. I set out about finding some appropriate yarn with which to knit this shawl, but stopped myself.  

As I got to thinking, I realized I have some Bare superwash wool (with 25% nylon, but that is less important for this project than some) from Knit Picks. I also have Jacquard acid dyes, so I set about to dye some yarn for this shawl. That way, with some luck, I could get exactly what I want.

The pattern calls for fingering, but says you can use sport and it will be more of a wrap. I'm good with that. It calls for 766-984 yards, so I dyed 4 skeins of the Bare, which will give me 1096 yards. This will also give me a bit extra for any shrinkage in the dyeing process.

The colors I used were fire red and brilliant yellow although, since I looked at the color in the tub rather than reading the label, I ended up with a bit of chartreuse in it as well. No matter how yellow it looks in the tub, chartreuse is actually a green. I noticed right away when sprinkling the powder on the yarn, so I stopped and got the actual yellow.


Here you can see the green. It wasn't tragic in this project as a bit of green in the leaves is OK. The yellow was rather chunky, so I added a bit extra. I put the red on both ends. This is before much mixing.


I wanted the yarn to be mostly red with some orange and perhaps a bit of yellow, so I made sure to mix them.


I put on the vinegar, made sure to mix it well, so I wouldn't get white spots and turned on the heat.

The hard part was waiting for it to finish and then waiting for it to dry.

The yellow turned out a bit more yellow than I had planned. I guess it needed more mixing, but I didn't want to have the red completely take over.  There were a few whitish spots, mostly around a couple of the ties, so I went back and painted those. 

They didn't turn out quite how I had envisioned, but I'm happy with the result. I hope it will look good in the shawl. 

The finished (almost dry) yarn. The red isn't as pink as it looks in the pictures. I need to figure out how to get more faithful pictures.

(almost) Time to cast on!

Wednesday, 21 October 2015

Crumpets

We were invited to a tea party this past weekend. I was asked to bring some of my homemade jams, which I was happy to do. I figure I had to come up with something to put them on and my husband suggested crumpets.

When we were living in England and I came across crumpets in the store, I had to try them. I had heard of them, but didn't really know what they were. They were tasty. Kind of eggy, but there are no eggs in the recipe. They are definitely different to English muffins...which I'm not sure if I ever saw in England.

I had made crumpets once before and was pretty happy with how they had turned out. I found the recipe online, but hadn't saved it. I think this is the recipe I used the first time, but I'm not 100% certain.

http://www.europeancuisines.com/England-English-The-Best-Crumpet-Crumpets-Recipe

It is the recipe I used this time. Since I was going to a tea party and didn't know the number of attendees, I wanted to make quite a few, so I made 3 batches. The packets of yeast come in sets of 3, which did play into my decision.

I do find it interesting that the website quotes an early crumpet recipe that uses eggs, but then doesn't use eggs.

Crumpets are interesting in that they have yeast and are allowed to rise, but are poured to cook in rings.
Ready to rise

3 batches risen. It is supposed to fall, but I ran out of time.
After the rising, you mix in salt then let it rest. Then you add milk and baking soda and they're ready.

Following her recipe, the crumpets turn out blind, with no holes. The batter is simply too thick. I didn't keep track of how many Tablespoons of water I added, but I know it was more than 10.  The first few crumpets of each batch are test crumpets.

Crumpet progression. The one on the left is almost completely blind.
I added water and tried another until they looked like the one on the right.

Cooking crumpet with lots of holes.

Part way through the cooking phase, I had to stop to go get my daughter and her friend from school. When I returned, the batter was all bubbly. It cooked up a bit oddly, but it seemed to do OK. Perhaps it is because I didn't let the dough rise completely the first time.

Bubbly dough

I of course had to sample them. Here are tea and crumpets with homemade strawberry freezer jam.


Overall, I think they turned out. I do think I should have made them a bit thicker. They freeze well and are best when warm, so I throw them in the toaster oven for a bit before enjoying.

Monday, 19 October 2015

Spinzilla!

The week of October 5th, I took part in Spinzilla. This is a friendly competition to see how much we can spin in a week.

Going in, I had no idea what to expect as to how much wool I'd get through. Many want to spin a mile, so I was hoping to spin a mile and get through up to 2 pounds of wool. I didn't know if this was reasonable.


I did some fiber prep the week before in that I decided I wanted to spin some fractal yarn, so I bought some fiber that would be appropriate and prepped it. I bought two 4 oz braids of Happy Fuzzy Yarn's Local Wool Project wool in "watermelon" and "woodpecker". I left one braid be, other than for loosening the fibers a bit to make it easier to spin. The other I divided into 4 lengthwise. The undivided braid will give longer color repeats because there is more fiber in each section of color. The divided braid will give shorter repeats because there is less fiber in each section of color. What this will result in is a barber pole effect when they are plied together. You get all possible combinations of color.

Watermelon, prepped. One braid was a bit lighter than the other, but not quite as different as it looks here.

Woodpecker, prepped.


Here is my pile of fiber for the week including the prepped fiber above. I knew I wasn't going to get to it all during Spinzilla.


These were the first to be spun. It turns out that I can spin about 8 ounces in a day when I don't have to work or take care of children.

These bobbins show the difference between the undivided braid on the left and the divided braid on the right. You can see the longer chunks of color on the one on the left.


The results:

Fractal spun "watermelon" 346.3 yards

Fractal spun "woodpecker" 352 yards
I like how both of these turned out. It also seems like I was somewhat consistent with them as there is only 6 yards difference between the two. Both are 8 oz and two plied.

One pound finished in the first two days. At this rate, I was going to hit my goal of spinning two pounds. I had already spun a mile. We get credit for each single as well as the plying.

The next thing on the list to be spun was 8.4 oz of a blue and white Romney Corriedale mix that I bought from Riin's HFY destash sale. I had prepped it the week before by "snapping" small sections to loosen up the slightly matted combed top.

Romney/Corriedale mix. Unsnapped on the left, snapped on the right
I like how this one turned out as well. The dye was not in a regular pattern, so when I spun it I ended up with different lengths of blue and white. It looks nice plied:
Finished Romney/Corriedale yarn. 302.5 yards
Next was some blue and brown fiber I bought during the last Spinner's Flock sale. I wasn't sure how to go about spinning it because the brown is kind of a core on the inside of the blue. I didn't want it to just get muddy. I had seen a sample of it spun and knitted at the sale and it had spots of blue and spots of brown, which is what I wanted. I tried separating out the colors a bit and doing random lengths of both to get blue/blue, blue/brown and brown/brown when two plied.

Blue Brown Roving. 388 yards

I'm mostly happy with how it turned out, but found it frustrating to separate the colors out to get this effect.

The next fiber was similar to the last in that it had colors in a core of other colors. This time it was green in a blue core (on the left in the picture below). Again I found it frustrating to separate out, but it got better as I went along and figured out the trick. I like how this yarn turned out. It is 80% mohair and very soft.


Blue green roving. 228 yards Multicolor combed merino top.

I had more roving that I had planned to do next, but I had purchased the multicolor combed Merino top (in the picture above) the previous month at the Spinner's Flock meeting and wanted to get back to combed top.

It was very nice to get back to combed top.

The photo does this top no justice. It is a beautiful purplish blue with streaks of yellow, green, purple, black...
I knew I couldn't separate out individual colors, but I did split this rather finely as I spun it, trying to get mostly one or two colors. I think it is a beautiful yarn. I started spinning it at the Spinner's Flock meeting on the Saturday of Spinzilla. I wanted to get it started, especially after seeing that the same vendor was there and had other colors of this mixed color combed top. I spun a bit and figured it would be a beautiful yarn so I ended up buying a gray/white/black merino/silk top to put with it. It also spun up beautifully. I really need to get a better picture than this, but was finding it difficult to capture the essence of the yarn.
Merino top. 357 yards. Gray merino silk 386 yards
I think these turned out close enough in size to use together, which was the plan when I bought the gray to go with the purplish one. I think they would make a fantastic shawl.

In total, for Spinzilla, I got 7116 yards of spinning credit. That's 4 miles of spinning and 3.5 pounds (8 oz of each color) of yarn. For finished yarn, it comes out to 2359 yards of 2 ply yarn.  I'm very proud of that...and kind of tired of my wheel. That being said, I bought 3 braids (6 oz total) of merino/yak from Happy Fuzzy Yarn because it is so deliciously soft.
Merino Yak in Cobalt
Besides being so soft, the Yak is grey, which does fabulous things to the colors when dyed. Again, my picture doesn't do it justice, but the purples and blues on the gray fiber are gorgeous!


Saturday, 12 September 2015

A good day for spinning.

First, here is the red silk that was last on my bobbin. I chain plied it and it is finished now. It turned out beautifully. I'm not sure what it wants to be yet. There is 2.8 oz, which won't do a whole lot.


My plan had been to not really do any spinning until Spinzilla in October which, frankly, was a silly plan. Today was our local spinners guild meeting. I'm so glad I went! Firstly, my lovely husband said he would watch a friend's children so my friend could go for the first time. Her daughters are similar in age to mine, and it seems like it went well. 

My friend, K, wanted to rent a spinning wheel so she could join us for spinning in general as well as Spinzilla. She's taken to it very well and seemed to be having lots of fun! 

I brought some blue wool that I bought about a year ago to spin for a sweater. I've already spun 8 oz or so of it. I'm two plying it. I had just plied what I had on my bobbins so my bobbins would be ready for spinzilla. Today I put more of it on my bobbin:


I guess the next thing to do is fill this and a second bobbin and ply them before October 5.

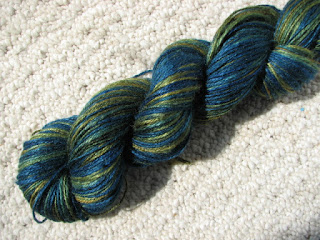
The thing that got me today was 8 oz of this gorgeous merino combed top. I always browse what the vendors bring. I started lusting over this and had to go back to get it. I had just enough cash for it, so perhaps it was meant to be. I can't wait to see how it turns out, but I probably should finish the blue first. I'm not sure what the colors will do when spun. I've gotten out of the habit of buying these multicolor rovings because the color often just seems to muddy when spun. I couldn't resist this.
I am somewhat proud of myself for not buying the lace/fingering weight uber soft yarn that another friend pointed out. She had purchased some and let me pet it. The thing is, I have so much yarn of that weight (but not nearly as soft) that I need to get working through before I can really justify buying more. That didn't work so well for the combed top above.

Another thing that I have on my needles: 

This is a project I've been working on for a little while. It is simply an entrelac scarf. The yarn is Happy Fuzzy Yarn  superwash sport in July Garden and Pollen. I adore the July Garden, but I'm a bit saddened by the really short color repeats. I thought that entrelac would be the way to show off this beautiful yarn and, while it is better, the color repeats are still too short to get blocks of color. That's the main reason I don't buy much multicolor yarn. It looks gorgeous in the skein, but as soon as you ball it up, you can see that it muddies. It also muddies in the project.  I do like how it looks, but it wasn't quite what I was aiming for.

Monday, 7 September 2015

What's off my bobbin?

While on vacation in July, I spun up this beautiful fiber that I bought from Inglenook Fibers via Etsy. It is 3.5 oz of beautiful Tussah silk.


Beautiful braid from Inglenook Fibers

Midway through spinning silk singles


It felt like it took much longer to spin than a similar weight of wool, possibly due to the extra twist required. Possibly it was also due to my Dad repeatedly telling me that it would be easier just to buy the yarn. He just doesn't understand.

I chain plied it to maintain the colors and wrapped it in a skein and kind of forgot about it until this week when I set the twist (am I supposed to do this with silk, like with wool?), thwapped it and hung it to dry. It turned the water an impressive shade of green.


Thankfully the wool I had in with it was dark colored. It didn't seem to affect it.

Here is the final project. I'm not sure what I want to do with it yet. By my calculations, I have 105 yards.


This is what's on my bobbin right now. It is 2.8 oz of Tussah silk, also from Inglenook Fibers. Tonight I get to ply!


I know Spinzilla is coming up, but I didn't think silk would be the best option to get lots spun during the week, but then I finished plying this silk in two evenings after the girls went to bed, so that wasn't bad.

Next is plying this and then working on a couple samples to be ready for Spinzilla. When I bought wool last fall, I had this idea for some barber pole striped yarn. I'm not convinced anymore that the yellow and brown that I got for it is the best idea.

Wednesday, 20 May 2015

Mints

This morning I collected herbs from my herb garden (OK, it's really my Mostly Mint garden) to dry. Last year I planted 5 kinds of mint (peppermint, spearmint, chocolate mint, apple mint and lemon balm) in this area after mostly cleaning out the saplings and other things that were trying to take over this area.
Mostly Mint Garden

I also planted oregano, which I was happy to hear is part of the mint family, so it may have be able to hold its own among the mint and sage. I was a bit surprised that the sage stayed somewhat green over the winter.

My two oregano plants took off over the last couple weeks, so it was definitely time to harvest. The peppermint and spearmint (no surprise) were trying to spread far and wide. Thankfully they look different enough to be able to separate out.

Lemon Balm
The lemon balm has the largest leaves of my mints. Once you cut a leaf, the lemon smell is pretty obvious. When this plant was given to me, I was a bit skeptical of using it for tea, but now that I've smelled it, I'm looking forward to trying it.
Spearmint
OK the lemon balm and spearmint look much alike in these pictures, but the spearmint is a bit fuzzy. This makes it not fun to get clean as the little hairs want to hold on to the dirt. Research tells me that spearment can be anywhere from not fuzzy to fuzzy, so this must be a fuzzy variety. It looks like it could be apple mint, which is usually fuzzy. Making a drink from it, I was a bit disappointed that it wasn't more minty. (See apple mint below)
Peppermint
OK the lemon balm and spearmint look much alike in these pictures, but the spearmint is a bit fuzzy. This makes it not fun to get clean as the little hairs want to hold on to the dirt. Research tells me that spearment can be anywhere from not fuzzy to fuzzy, so this must be a fuzzy variety. It looks like it could be apple mint, which is usually fuzzy. Making a drink from it, I was a bit disappointed that it wasn't more minty. (See apple mint below)
The peppermint has more deeply veined leaves. No fuzz, so it's easy to tell apart from the spearmint.


Apple mint
This looks like the peppermint in that it has no fuzz and relatively deeply veined leaves, but it has a dark stem. This has the best, most minty smell to the leaves in my opinion. I really need to try it for tea. I wonder a bit if this is actually the spearmint and I messed up the labels. I'm looking forward to trying this one as tea, but it's one of the smaller ones.

Chocolate mint

I saw chocolate mint at the store last year and couldn't resist. It has a dark stem like the apple mint, but it is smaller and has a darker tint to the leaves. The leaves do smell a bit chocolaty along with the mint.

blurry oregano

I need to replace this picture, but it's getting late. The oregano definitely looks like it is part of the mint family. No minty smell here though.

Oregano
I have two plants about this size of oregano. It really shot up over the past week or so, so I decided I needed to harvest some. I wanted to try drying it.

Dabbing gently
I cut the stems with kitchen scissors. Most of it needed at least a brief rinse to get any soil off. The spearmint needed more of a going over to get it clean. I put it on paper towel and dabbed it a bit with another piece to get the water off.

Bundled up
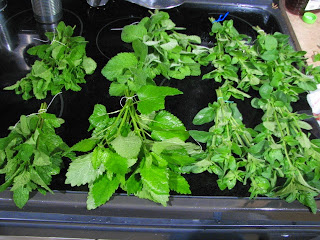
L-R peppermint, spearmint (top center), lemon balm (bottom center)
and four bundles of oregano on the right.
I bundled it up in 4-7 stem bunches. Two bundles have twist ties, the rest are tied with crochet cotton. I can see why they don't recommend hanging the mint to dry. The spearmint especially has thick stems. I can see them taking a while to dry.

Hanging to dry
I put loops of string around the supports of my drop ceiling in my basement craft room. There is a dehumidifier running in the room anyway, so I thought this might be a decent place to dry the herbs. A safety pin joins the tie of the bundle to the loop in the ceiling. 


Monday, 2 February 2015

Fairy door

Valerie's friend has a fairy door in her house. She leaves little things for the fairy and the fairy leaves little things for her.


I thought this was a good idea. I'm not so sure any more.

Her friend's mom, K, gave me a door (and the door knob to go with it) that she had purchased. It was plain wood. Oddly enough, I could only find two tubes of craft paint. I used to have tons of the stuff, but must have cleared much of it out for some move. I had purchased violet paint for the sand tray and managed to find a lonely tub of white.  I painted the door.

I put on two coats. Our house is dry so the paint dried very quickly and I was mostly able to keep going without pausing. Two coats just covered better. K said she used a glossy paint and thought it worked better. I just wanted to use what I had so I used the craft paint and put two coats of Modge Podge on it. The Dorr has a window, so I glued a scrap of fabric to the back for a "curtain".

Our house has this perfect place for a fairy door. Where the stairs come down, the bottom step wraps around the partial wall.

I used double sided tape to stick it to the wall on K's recommendation. The double sided tape we have is the padded, thick stuff so that's what I used. I didn't think to ask if she meant that or the thin stuff. If you look, you can see it, but I think it's OK.


The fairy left a note that says something like:

To the Fleming Family,

We heard from our friends, who live with your friend, A, that you are nice. We hope it is OK that we share your house with you.

Love,
The fairies.

Valerie wrote back welcoming them to our house.  She was upset that they didn't give her anything the next day. She's been upset about this often. She's left more notes and little gifts for the fairies, and gets upset that the fairies take her notes and don't leave her anything. Trying to explain that the fairies aren't likely to give her something every day or that they're busy does no good.
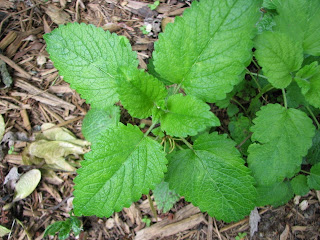
The fairies have given the girls an origami star each and another note. Valerie asked what their names are. The mom is Pennyroyal (Penny), the dad is Hibiscus and the daughters are Zephyr (Zip) and Wren.

This has mostly been fun so far, but I'm a bit annoyed that Valerie expects things from the fairies daily. I'm going to continue working on getting her to understand that the fairies have their own lives and won't be able to give her notes or gifts every day.

I'm not sure if Valerie would recognize my hand writing, so I've been writing notes for Valerie on the computer with a script printed font.

Monday, 12 January 2015

Carding

An update on what I'm working on:

What I'm most excited about at the moment is some alpaca fiber. I bought some brown alpaca at the Fiber Expo in the fall.

Off the top of my head, I think it's the fleece on the right. Both brown are alpaca. I've now washed all of these fleece. The original plan was to blend the alpaca with some wool to knit a sweater. I don't want it to be 100% fleece for two reasons. 1. Alpaca is warmer than wool and I don't really want to make the sweater so warm that I can't wear it much. 2. Alpaca doesn't have the elasticity that wool does. If I made a sweater of it, it would droop over time and get out of shape.

I do have some brown wool that I can blend with it. It is also brown (Border Leicester), but a darker shade. Blending the two would, in theory, give a color between the two.

Looking at the shorter staple length of the alpaca and knowing I wanted to blend the fibers, I got some cards.
Alpaca on wool carder

Alpaca removed from wool carder

I didn't mind the process of carding. It's pretty simple and does work. I wasn't excited about the rolags I got. I like spinning worsted from top or roving. I didn't like that I had no length along the direction of the fiber. It carded the alpaca well enough but, considering the length difference between the alpaca and Border Leicester, they didn't seem to want to blend well.

I did take the rolags, rolled from one end of the card to the other, so that the fibers would remain straight and aligned, and pulled to try to end up with something similar to roving. That's when I discovered that it wasn't blended all that well. Perhaps I just need more practice.  I took to combing wool quickly and like the results I got, so that will remain my preferred method of processing washed wool.

You can see the lighter alpaca and darker wool being blended


My friend bright over a drum carder that she had rented. I thought I might like that better as I'd get something that has a length equal to the circumference of the larger drum. I could split that more easily into something similar to roving and it might be better to spin. I was right.

We ran the fiber through the carder 3 times and ended up with a nice looking batt. We did have to adjust as we went as we weren't sure how much fiber we could put on the drum carder. In the end, we had two batts with different fiber ratios. One is close to 50:50. The other is roughly 75% alpaca.


You can see the color difference between the two batts. The one on the left is 50:50, and possibly not blended quite as it could be. The one on the right is 70ish % alpaca.

The thing that bothers me about the drum carder is the amount of waste. I did get a fair amount of waste with the combs, but this seemed like even more.

I've now spun and (Navajo) plied both of these batts.

75% alpaca on the left, 50:50 on the right
I think the 50:50 could have been better blended. It spun reasonably well. I enjoyed spinning the 75% alpaca better. The next step is to knit swatches to see which I like better. I think one more thing I want try is spinning singles of the alpaca and wool separately and plying the two different singles. I'm not sure if I want to do one ply of each or two alpaca and one wool or two wool and one alpaca. I'll probably try each.

I've now rented a drum carder for the month. I just need to finish figuring out how I want to process the rest of the alpaca. Once I get that figured out, I'll be able to finish processing the fiber.